
How to Make and Burn a Christmas Slideshow to DVD
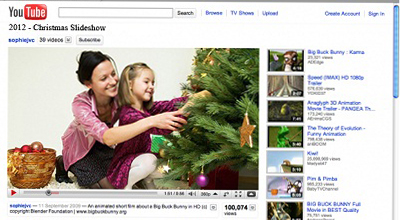
If you want to make a Christmas slideshow with the Christmas pictures you took, burn it to DVD or share it on YouTube, MySpace, or other social networking sites that allow to share videos, then Photo DVD Maker is what you need. It can make Christmas slideshows with Christmas pictures and Christmas songs. The Christmas slideshows that Photo DVD Maker powered can be burnt to Standard DVD, Blu-ray Disc, AVCHD Disc, VCD 2.0 (Still image) and SVCD, and it can also be generated to video Christmas slideshow in formats like MPEG, MP4, AVI, DivX AVI, WMV, VOB, MOV, FLV, RM/RMVB, and ASF. Christmas pictures in BMP, JPEG, JPG, PNG and TIFF formats and Christmas songs in MP3, WAV and WMA formats are all supported by this Christmas slideshow maker.

![]() Free download Photo DVD Maker to Make a Christmas slideshow
Free download Photo DVD Maker to Make a Christmas slideshow
Totutial on How to make a Christmas slideshow for Websites
Step 1. Add Christmas pictures and organize the Christmas pictures

The above screenshot is the first interface of Photo DVD Maker. There are three panels on the upper part of Photo DVD Maker. The first two panels can help you find your Christmas pictures in seconds, and the right panel is for previewing Christmas slideshow. After you find the Christmas pictures, you can use the "Add" and "Add All" button to add the Christmas pictures to Photo DVD Maker. If you want to delete an added Christmas picture, you can click the Christmas picture and click the "Delete" button to remove it. By the way, dragging and dropping can help changing the orders of the Christmas pictures you added.
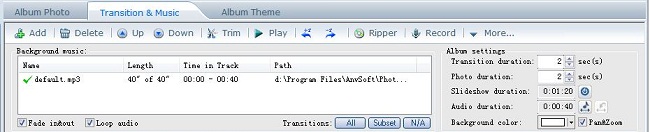
Step 2. Add Christmas songs to your Christmas slideshow
From the screenshot above, you can know that adding Christmas pictures and organizing Christmas pictures are taken under the tab "Album Photo". To add Christmas songs to your Christmas slideshow, you need to go "Transition & Music" tab. There are "Add" and "Delete" buttons under the "Transition & Music" tab too. You can use these buttons to add and remove Christmas songs. ( Christmas Songs for Making Christmas Slideshows )
Step 3. Choose a theme to decorate your Christmas slideshow
If you want your Christmas slideshow just use your original Christmas pictures and without any theme to decorate it, you can skip this step. But if you would like to try the Christmas theme Photo DVD Maker offers, then please click the "Album Theme" tab and scroll your mouse to select a Christmas theme.
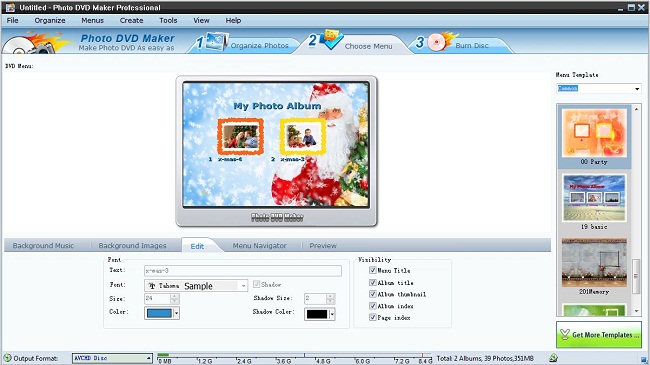
Step 4. Choose a DVD menu for your Christmas slideshow DVD
If you plan to share your Christmas on YouTube and do not want to burn your Christmas slideshow to DVD, then you can skip this step too. If not, then you need to click the tab "Choose Menu". The following screenshot shows the interface of "Choose Menu" tab. As it is shown, it has a preview panel, menu template panel and 5 tabs (Background Music, Background Images, Edit, Mene Navigator, and Preview). You can choose a DVD menu from the menu template panel and customize it with the 5 tabs. The "Background Music" tab allows you to add Christmas songs as the background music of the menu and the "Background Images" tab allows you to change the background image for the menu.
step 5. Publish your Christmas slideshow
Whether you made your Christmas slideshow for burning to DVD or sharing on YouTube, the last step is to publish the Christmas slideshow. You need to click the "Publish" tab to come to the last step. The interface under the "Publish" tab has options for choosing the output method, so you just need to choose the output method for your Christmas slideshow and then click the "Burn Now" or "Create Now" button to finish the whole process.