
How to Add a Rainbow to a Photo with Funny Photo Maker
In this Funny Photo Maker Artistic photo effect tutorial, we’ll learn how to easily add a rainbow to a photo! As we’ll see, Funny Photo Maker equipped with a lot of artistic photo effect template for us to use. We’ll learn where to find the rainbow photo effect and how to make the rainbow photo effect work for you. We’ll also learn how to set the location, width and length of the rainbow, which we’ll need to do to create a better rainbow photo effect. Of course, like the use of most photo effects, editing the right type of photo will helps a lot. Therefore, a photo taken outdoors is a good example. If the photo is about a landscape and was taken after a rain, the rainbow photo effect will look better! We will use the free photo editor Funny Photo Maker throughout this tutorial, so if you do not have this free photo editor, you can download it from below.
>> Free download the free photo editor Funny Photo Maker
Here’s the photo we’ll edit with rainbow photo effect:

The original photo.
Here’s what the photo will look like after adding the rainbow photo effect:

The final rainbow photo effect.
Youtube Video Tutorial:
Let’s get started!
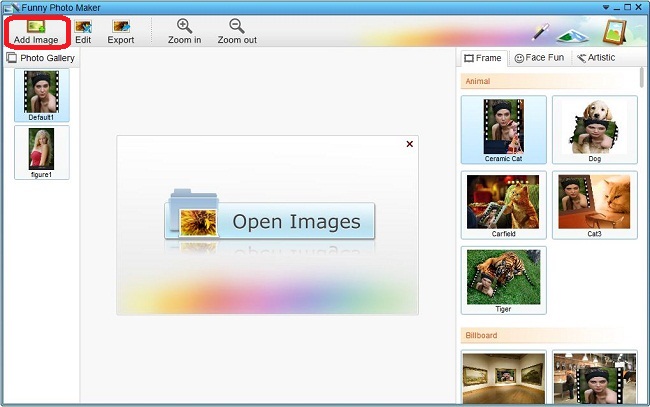
Step 1. Add a photo to Funny Photo Maker
There is an "Add image" button on the top left of this free photo editor. Click this button to add a photo to Funny Photo Maker.
Step 2. Find and add rainbow photo effect
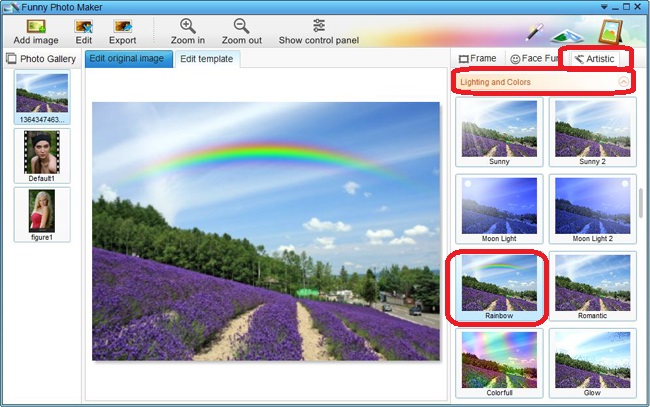
As the screenshot above shows, on the right of the free photo editor's interface, you can see many photo effects. Before users choose any photo effect, this free photo editor will show the first photo effects of the first category - Frame by default. So the photo effects you see on the right of the interface are Frame photo effects.
But rainbow is one photo effect in Artistic, not Frame. So you need to click the tab "Artistic" first, and then find the rainbow photo effect. To quickly find the rainbow photo effect, you hide the unfold tabs until you go to the tab "Lighting and Colors". Under the tab "Lighting and Colors", you can see photo effects like Sunny, Moon Light, and Colorful. Rainbow is the fifth photo effect. You can see where the Rainbow photo effect is from the screenshot below.
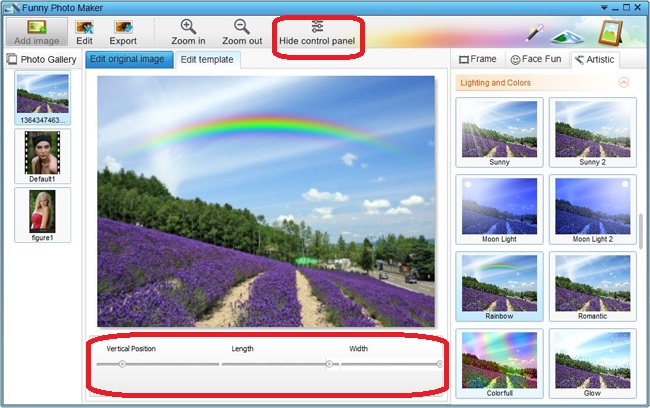
Step 3. Edit the location, width and length of the rainbow photo effect
On the top of this free photo editor's interface, there is a button "Show control panel". Click this button, then the control panel will be shown beneath the preview window and the button name will change to "Hide control panel". In the control panel, you can see the settings for the location, width and length of the rainbow photo effect.
Step 4. Save the photo with rainbow photo effect
The button "Export" on the top of the interface is for exporting photos. Click that button, a new window will open, which will lead you to save the photo. In addition, you can share your photo on Facebook, Twitter and Flickr through that window too.